WordPress default login page is one of the most used pages in most of WordPress based website for admin login. Though simple and clean, it is heavily branded WordPress. However, most of new users do not need to know about the underlying software your website runs on.
It is a good idea to add your own style to the login page to make it more inviting and align it better with your website. But the problem is the many of us don’t know how to customize or change default WordPress login page. You can do this by adding your own logo, changing the typography, color of the form, background, and adding a useful links in the form. When customized properly, the login page can be a useful entry point for your users, welcoming them to your website.
Luckily, WordPress gives you the functionality to customize default login page with just changing a little code. In this post, we will see how to customize the login screen with a few WordPress hooks in your theme file, then we also talk about few plugins that can help with the task.
Customize the WordPress Login In Your Theme
On of the most easiest way to changes to the WordPress login page is to add some code directly to your theme which is currently active. You can see this Code in the functions.php file. This is a most important and required file, so any code used here will work in any theme. I would recommend you to making these changes in a testing mode first before live your website.
The first thing to do is open your theme’s directory, and create a new folder in the root with the name of login. We will use this folder to hold the images and CSS stylesheets for our custom login form.
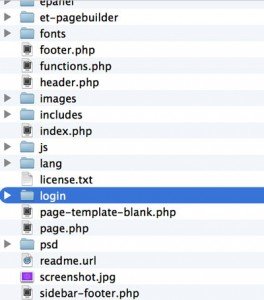
Now, open the functions.php file in the editor like Notepad, Dreamweaver etc. The file contains hooks, functions and filters which are necessary for your theme to work. We will adding all of our code to the bottom of this file. Any changes made to this file will only take effect to the theme it belongs to. If you choose to activate another theme, you will have to add this code to the new theme’s functions.php file.
Changing the Login Logo
First of all you need to save your logo image in the login folder you which we created. The default size for this image is 80 pixels x 80 pixels. You can also create your own size logo, but make sure it is square so that it fits the dimensions perfectly. I would recommend you to saving a transparent PNG logo file, so the image works on any background.
Simply just save your logo image as logo.png to the login directory. Then, at the bottom of your functions.php file, add this below code. (Copy and Paste) 🙂
function my_loginlogo() {
echo ‘<style type=”text/css”>
h1 a {
background-image: url(‘ . get_template_directory_uri() . ‘/login/logo.png) !important;
}
</style>’;
}
add_action(‘login_head’, ‘my_loginlogo’);
We using the login_head WordPress action to add a small bit of CSS to the <head> section of the login screen’s HTML. Make sure to include the “!important” flag in your CSS, so that the default logo image is overwritten.
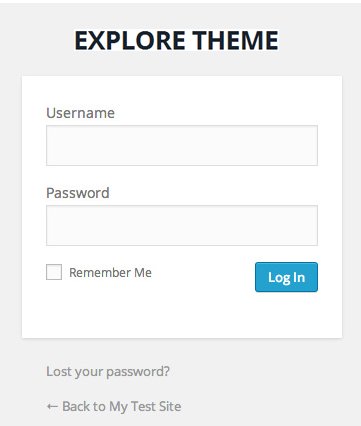
After adding the above code, you will see your own logo appear on the login page, directly above the form. It’s So far so good.
Adding a Custom Stylesheet
The login screen is looking not bad but not so good, there are a few more style changes that still need to be added. For one thing, the logo is still fairly small. I would also suggest you to change the colors of the background and form elements that match your brand a bit more.
In the login directories you need create a new file called login_styles.css. Then, open this file in the editor. You can add any kind of CSS to this file, but you’ll need to confirm to the HTML markup produced by WordPress. For a full list of classes and IDs for you to hook into on the login page, visit the WordPress codex.
For Example :
/* Change background color and font family */
body {
background: #f8fafa;
font-family: Arial,Verdana,sans-serif;
}
/* Change Width and Height of Logo Image + Add Custom Image File */
.login h1 a {
background-image: url(logo.png);
width: 213px;
height: 97px;
background-size: 213px 97px;
}
In the above Example, i added back ground color and font family to change the general typography of the page, and the main background.
Remember : In this section you need to add your own custom Stylesheet as you want.
In order to changes take effect, you will need to enqueue this stylesheet using the login_enqueue_scripts action. Go back to your functions.php file and add this small block.
function my_logincustomCSSfile() {
wp_enqueue_style(‘login-styles’, get_template_directory_uri() . ‘/login/login_styles.css’);
}
add_action(‘login_enqueue_scripts’, ‘my_logincustomCSSfile’);
You can also remove the my_loginlogo function from the first step, as this code has now been incorporated into the stylesheet.
Helpful Plugins
A few advance WordPress developers have created plugins that can do the heavy lifting for you, if you would prefer to stay away from coding it yourself. The following plugins are helps you to customize different element of the login page, and they might be exactly what you need.
Custom Login
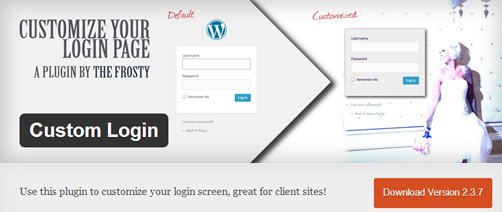
Custom Login plugin allow you style every element on the login form. You can upload custom background images for the body and login form, or custom logo to replace the default WordPress logo. You can also modify the color of backgrounds, text and links. The plugin also let you to add custom CSS, HTML and Javascript into the page.
Uber Login Logo
If you are looking to change the logo on the login screen in a simple way, you can use Uber Login Logo plugin. It offers you to upload any image through it’s settings page, which it swaps in for the default WordPress logo. Keep in mind that only the logo is replaced, and that you have to confirm to the default dimensions.
Sky Login Redirect
Sky Login Redirect takes an interesting approach to customize your custom logo screen. It will simply be brought back to the page they were browsing before login. So if a user is reading a post of yours, then logs in, they will be brought immediately back to that article. If you have a membership website, i would recommend you to Sky Login Redirect is perfect for your.
